The grand-daddy of all frustrating puzzlers, and arguably rei-chan's finest work (even finer than Code Red). It's also unique as there are even red herring items in the game, possibly hinting it was planned to be much longer. There is so much packed into this baby that three of the boards exceed 19K, and one exceeds 18K!
People have complained about the ridiculous difficulty of Mission: Enigma (especially the final board), and few have beaten it without cheating. Below is a complete walkthrough.
It's without a doubt the best 10-board game (12 after title screen and ending) ever made, although it's a shame that the plot wasn't more fleshed out, possibly because rei-chan didn't want to risk runtime errors. It still deserves a 5/5.
WALKTHROUGH Steps starting with the word SAVE require precision timing. If you mess up, you won't get a second chance. Most importantly, do not waste your ammo!
PART I - MAIN FLOOR 1. SAVE. Hide north of the bush until the sentry goes to sleep. Enter the fortress. 2. Read the DOS 9.12h manual. Enter the southwest room. 3. SAVE. Stand a bit away from the knife trap. Activate it, then step out of the way and touch it from the north or south as it flies toward you. 4. Shoot an empty bottle (ammo=5). Pick up the shard. 5. Enter the southeast room. Touch the guard to stab him. Grab both items on his body. Unlock the door he was guarding and enter the basement. 6. Light a torch. Ignore the oil barrel and bucket (red herring) and keep walking ahead. Touch the guard to stab him. Grab both items on his body. Pull the bar to the right and walk west. Set AC to maximum. Turn off the water valve. Walk west to see a left bucket. Move that bucket three spaces east so that it's aligned with the straight pipe section jutting out of the wall. Shoot the straight pipe section (ammo=4). 7. SAVE. Turn on the water valve, then immediately turn it off. Pick up the bucket filled with water. Return to the main floor. 8. Pick up the ammo in the southwest room (ammo=6). Enter the northwest room. Ignore the bottle of red wine (red herring). 9. SAVE. Shoot the east air duct (ammo=5). It might take a couple of tries to get this, but don't use more than 2 ammo to do it. This walkthrough will assume you destroyed it using one shot. Enter the north room. 10. Push the crate so that it's adjacent to the air duct, destroying it. Enter the northeast room with the crate. 11. SAVE. Shoot the air duct (ammo=4). 12. SAVE. Move the mirror east, then north so that it's positioned at the northeast corner. Do not slam it against the wall or else it will break! 13. Exchange the diamond on the pedastal with the ruby ring. Fire the lazer. Touch the flames to douse them with your water bucket. 14. Push the crate so that it's west of the lower part of the spring. Activate the spring, then push the wall back. Push the crate one space west to destroy the air duct. This will move the crate one space north. Now push the crate all the way to the end of the hallway and destroy that air duct. The crate will then move one space south due to the explosion. 15. Push the crate east to where the air duct in the southeast room once was, then walk around and push the crate north. Now you can push the crate into the west room. There are a couple of things to take care of before you do that, though. 16. Walk outside and pick up the clay. Enter the blue passage, light a torch, and pick up the gloves. Walk out and re-enter the fortress. 17. Re-enter the basement via the southeast room. Light a torch if necessary. Cover the punctured water pipe with the clay, then turn on the water valve. Return to the main floor. 18. Use the crate to destroy the air duct in that room, then push it into the north room and onto the right panel. Now you can enter the second floor!
PART II - SECOND FLOOR AND COMMTHOUGHT 19. Here is the electric maze solution. When you solve it, enter the north passage: A. Center room: Press B. Left room: Middle, left, right C. North room: Left, right D. Left room: Middle E. Right room (3 buttons): Left, middle F. Far right room: Press 20. Press the switch, then enter CommThought. 21. Clear the rubble. Walk over to the green defensive chip, making sure not to touch anything else! The right section of the defensive chip will have a panel. Open it and grab the silver key. Leave. 22. Re-enter the second floor and unlock the silver door. You'll end up in the basement again after going through a series of passages. Light a torch, then make a note of the manual override code. Leave and re-enter CommThought. 23. All of the purple buttons have a letter designation. Press them in the exact order of the manual override code. The forcefield should lower. Fix the electric wire break, then leave. 24. Press the switch and enter the green room to play GEMini. 25. SAVE. Defeat CommThought at GEMini. The general strategy is to move pieces 1 and 2 towards the center. Once you do that, it will be impossible for CommThought to win. 26. Enter the passage to the right of CommThought to get one ammo (ammo=5). Attempt to enter the left passage, then quickly touch the blockade. Once Karen finishes casting Levitate, enter the passage. 27. SAVE. RUN!!!
PART III - BOSS FIGHT AND CAVERN OF ILLUSION 28. SAVE. Don't attack Karen or Maleen. Instead, shoot Dr. Kris up to five times by continually touching your console, then finish him off with a melee attack. Once you control Karen, alternate casting spells against the demon and melee attacking the demon on your end. You should deal damage faster than Maleen can heal. When you win, head north to enter the hardest section of the game. NOTE: If you're not fast enough and Karen dies, you won't get the extended ending. 29. SAVE. Be quick, as you'll need every last bit of that time! Grab the three visible rocks (ammo=3). Position yourself so that you're south of the right dragon, then touch it twice. As it opens its mouth, move away and it should shoot south to reveal another rock. grab it (ammo=4). 30. SAVE. Talk to Karen to get her out of the way. Face west of the right dragon and touch it. Step away and it should destroy the left dragon. Touch its remains to grab the golden key. Touch its remains again so that it moves aside. Walk on the space where it used to be, then touch the west wall to pick up a hidden rock (ammo=5). Unlock the door. 31. SAVE. Carefully shoot the snakes, as you can only afford one shot for each of them (ammo=3). Unlock and enter the room to the north. 32. SAVE. Here is the solution to the Music-Lock combonation [sic] room. The numbers represent equivalent positions on a clock. 12 is the north door, and 6 is the south door. There is no 3, 6, or 9. A. 11, 5, 8 B. 11, 5, 2, 11, 5, 7 C. 2, 11, 5, 11, 5, 8, 11, 5, 2 D. 11, 5, 1, 4, 10, 4, 11 When you clear the room, you should have at least 140 ticks remaining on the clock. If you don't, you won't have enough time to escape. Head north. 33. SAVE. There is a suspicious piece of the wall sticking out. Shoot it, making sure that there is a one space gap for it to register (ammo=2). It should turn into a boulder. Push that boulder two spaces west so that it's out of the way. 34. Unlock and enter the west room (the one with the triangle things). Those triangles are stalactites. Shoot the rightmost one from the south, again making sure that there is a one-space gap (ammo=1). It should fall one space south and turn into a boulder. 35. Push that boulder east. Open the door to the east room, then push the boulder east so that it dislodges the key from the pedestal and takes the place where the key once was. Grab the key, then turn the water valve on and off. 36. Go back into the north room and shoot east into the river (ammo=0). This will reveal a secret room. Use the lettered buttons to change the white door into the matching door of your key. Each letter represents a different color. 37. Once that's done, hurry through the colored door and out of the fortress! You win!
This game is without a doubt, the best ever game by Gregory Janson after Code Red. The plot is quite good, while some games completly baffle people with complex plots, and terrible gameplay, Mission Enigma has a simple plot and easy to learn gameplay, with some seriously brain hurting puzzles. The game has also a basic 6-shot engine, where you normally (with the exception of the ammo cheat) can't carry more then 6 bullets (the agent is most probablys armed with a 6-shooter style gun). The title screen is great, like watching a comedy. The music puzzle is very frustrasting, but the rest of the game is quite fun.
Mission: Enigma is one of Greg Janson's best games, and that is saying something. If you look through all the games he made while still an active zzter, you won't find many that aren't great.
This game in particular is an excellent puzzle/mystery; it presents quality graphics, excellent programming, and very clever puzzles (some which are downright horrific! You've heard of brainteasers? Well this has brain torturers). I'd have to agree with Wells about the bit with the knife and the lack of a solid plot. All in all, however, it is a very solid game.
Considering its age, Mission: Enigma stands up to almost every game since. It isn't a standard ZZT shoot 'em up, though... it requires wits, and the wrong move can get you killed in a flash.
This was a really great game. It was quite realisic (in a way). The title page had a funny little story. It was a great game.
Probably the best thirteen or so boards of any ZZT game are packed into this wonderful package. The puzzles are so wonderfully done and so much is packed into the second board that I'm surprised it all fit. I did have to dock it half a point for the ending, which doesn't live up to the build up of the game. Oh, and for the minigame, which is so easy, it's boring. Even a logic puzzle in disguise as a game would have been better.
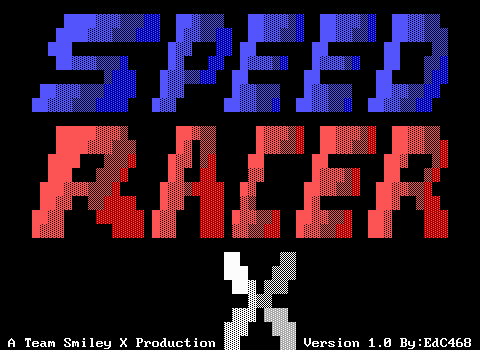
Mission: Enigma still has me baffled. I could never complete the game. I don't know about the music because I can't hear it with my system. The title screen was really great and well done, too. Gregory Janson is a true master of ZZT!
one of the greatest clasic games known to zzt! awesome!
Amazing how much you can do in 9 boards. The gameplay for Mission: Enigma is mostly on the second board, and it includes a few ingenius item using puzzles - the alternative to the inventory engine technique.
One of the classics of ZZT, Mission: Enigma packs a lot of gameplay into a very small file, combining a freewheeling (read: incomprehensible) spy/fantasy/science fiction plotline with a sense of fun and imagination. Proof that good puzzles can be done without the use of an inventory engine, Enigma's gameplay shines, except for that bit with the knife.
And, of course, Enigma pioneered the Mission: Enigma title screen, in which characters use the title screen to bicker and perform little tricks. Just a bit of ZZT trivia, there.
Pros: Nice puzzles, good design Cons: Tepid plotline, the knife puzzle Rating: 9/10