Building ANSI set-pieces to decorate your game is a lot easier when you can use whatever characters you please. Weave 3's biggest advantage over other forks is the removal of the limit on custom characters: faster to modify, easier to copy around, and leaves stats open for moving elements and objects. It also de-clutters the stat list, which is a big time saver late in development when you're trying to sleuth out what object does suchandsuch. (Here's a hot tip: if an object runs code, even a single line, give it a @Name.)
However, every limit lifted comes with a question: with fewer strictures, have I doomed future Weave projects to expand beyond an attainable scope? For a month after releasing Weave 3.2, I thought I had- I knew I wanted to devote many screens in my next game to rich, lush full-art boards, but also knew that I could easily burn through all my time and motivation making them.
I was saved not because I learned to reign in my ambition, but because I stumbled onto some modern tooling that hugely sped up my process. The method I use is outlined in this article, and the tools and materials are linked below for anyone to try for themselves.
There are thirty-three large set-pieces in Galactic Foodtruck Simulator 2999 that used this method. Each piece took a couple hours to complete, mostly because I was (a) just learning to use the tools, (b) being extra fiddly with character details and (c) indecisive with color choices. I think realistically, you can expect to knock out something decent for half that or less.
The short version
The pipeline is, in short: Paint to sketch, Moebius to draw, Zima 0.9.0 to import, Loom to finish. Links to the .PNG and .ANS templates, my build of Zima 0.9.0 (YMMV) and installers for Moebius and Loom are below as well as at the end of the article.
The long version
The materials you'll need to go on this journey are as follows:
- Your favorite Paint program.
- I'm still using Paint.NET because it's free and the community addons are powerful.
- Moebius, an ANSI/ASCII editor.
- An import .PNG template for Moebius.
- A template .ANS for Moebius.
- Zima 0.9.0 (might have to build from source, see the note at the end)
- LoomZZT or ZLoom2. Both of these programs are included with Weave 3.
Step 1: Roughing Out
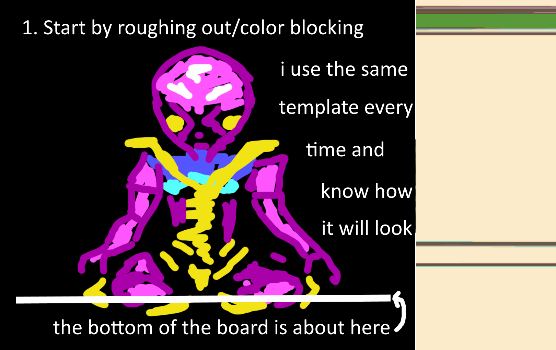
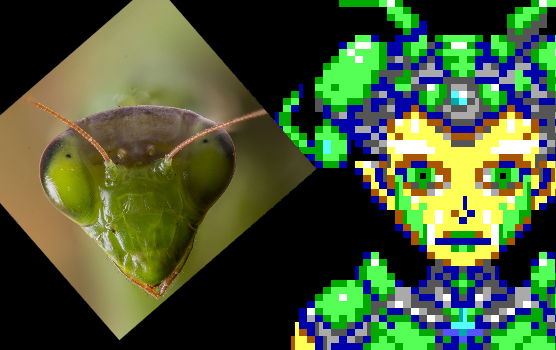
Starting with my standard PNG template, I sketch out the roughest version of the piece. At this stage, we're identifying what colors we want to use and where - the fine detail will come after we're in Moebius itself.
Sources and References
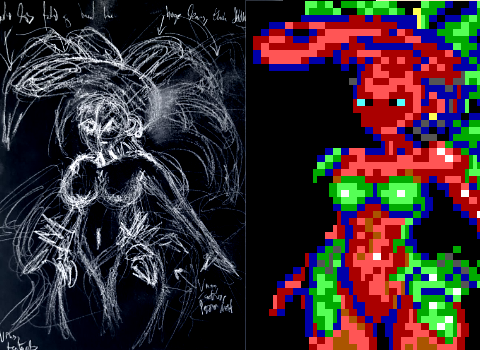
Sometimes, I will use a reference image for this stage, such as a praying mantis image when drawing the Hive Queen:
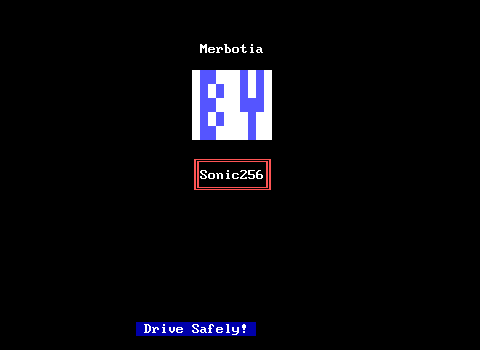
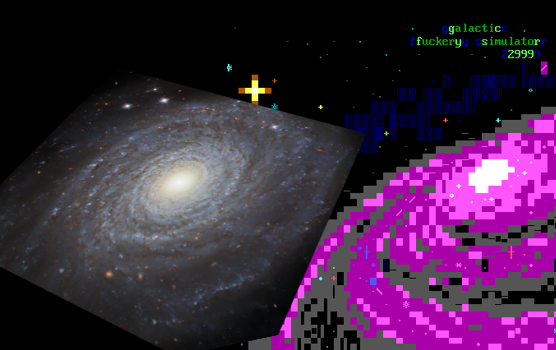
I may photobash two or more public domain images and reference the result, as I did when creating the title screen:
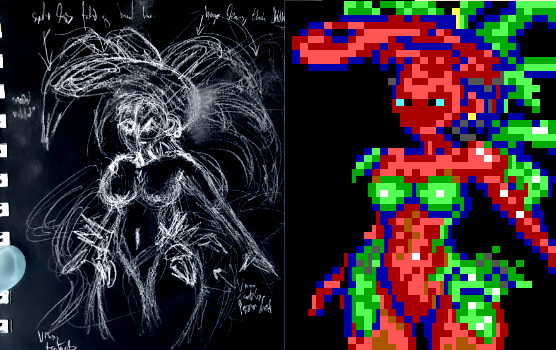
Other times, I'll sketch on paper, take a photo, invert the colors, and use that as a template:
However you choose to make it, just make sure it ends up mounted on the PNG template ready for import.
Steps 2-4: Import to Moebius
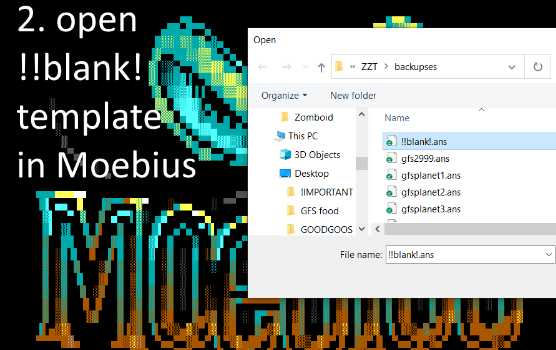
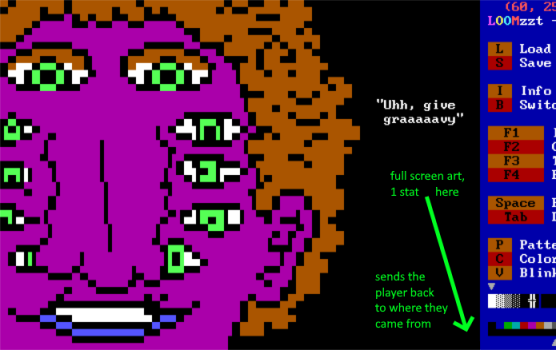
The ANS template is useful for a couple reasons. One, the dimensions are correct, with the ZZT sidebar columns already filled. Two, settings that are easy to miss like picking the correct IBM font and turning on high color mode, are already done in this template.
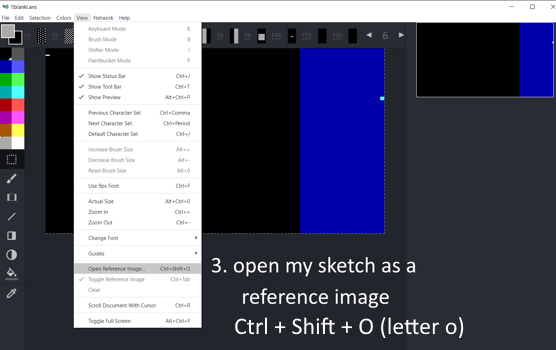
Next I open the populated template file with Ctrl + Shift + O (letter o), but you can use the View menu and choose "Open Reference Image" too. This will add the template image to the board as a kind of translucent overlay:

After selecting the paintbrush from the sidebar and Half Block mode from the top, we're going to get deep into this image. Zoom in and strap in, because now comes the artsy-fartsy part:
Steps 5-6: Draw the damn thing
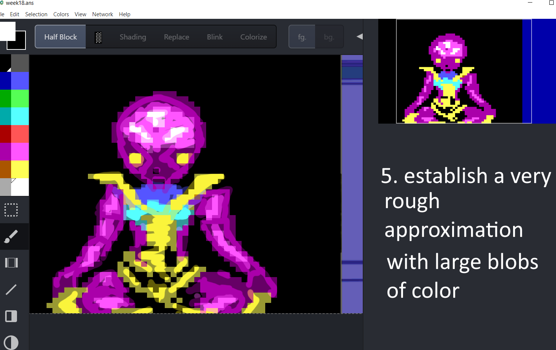
Don't be precious at this stage. This is a rough-in. Slather the canvas with blobs of color. The important thing is to get some general fields in place that match your sketch and can be shaped and tweaked later.
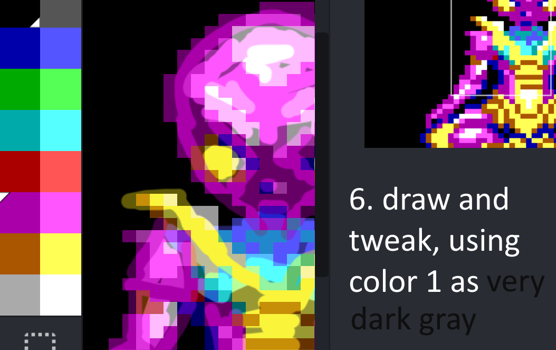
Note: Swapping dark blue color 1 for a very dark gray was an artistic decision I made for GFS that I think will carry over to future projects. Adding a little splash of dark undertone is a quick and effective way to make the images come alive. Your mileage may vary and you may have other palette needs, but it's something to think about as you draw.
Using Ctrl+Mousewheel to zoom in and out of an image, you can continue to add fine detail, highlights and shading, while not losing sight of the big picture. At this stage, the piece should be pretty good, not perfect; the finest details will get added at the very end in your ZZT editor of choice. Once you're satisfied you've gone as far as Moebius can take you, Save your work to a .ANS file, export the image as .PNG, and fire up Zima.
Steps 7-8: Import Import Import
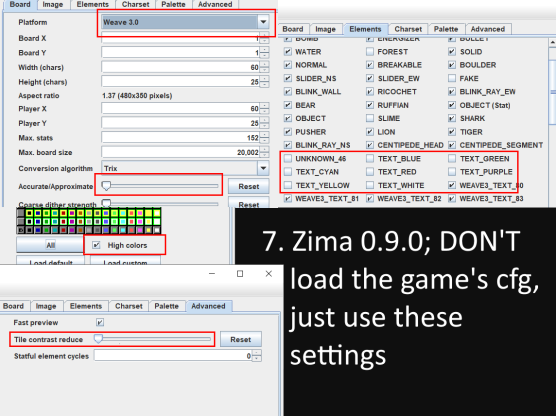
Fire up a copy of Zima, version 0.9.0 or later. Resources at the end of this article include my Zima .jar file, as well as tips for building from source. Unfortunately the current Zima doesn't save the above settings so they have to be input on startup every time.
Note: Switching the "Platform" setting to Weave 3.X opens a prompt asking for a CFG file. Unless you have something specific in mind, hitting 'Cancel' here is recommended, as Zima will fall back to its default settings for Weave 3, which is what you want 99% of the time.
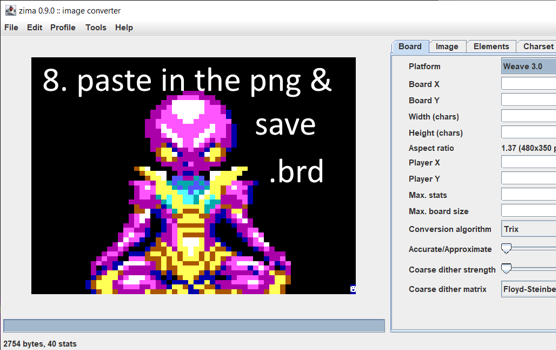
Paste in your image, make sure the aspect ratio is still correct, (crop the right hand side as required) and save it as a .BRD; the image preview should look exactly like the set-piece did in Moebius.
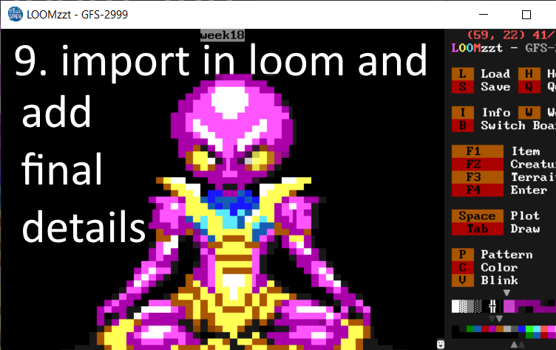
Step 9: Finishing
This is when the finest details will be teased out of the drawing. Import the .BRD to Loom or ZLoom2 (both are included in the Weave 3 download) and make minor adjustments as needed.
And you're done!
You now have a robust set-piece for your game. Copy it, paste it, put walkable areas in it for the player to move through, whatever your game needs.
Final Thoughts
I say this a lot, and I truly believe it: While it's possible to use Weave to do all the things, it would be miserable. That's not what Weave is for. Weave is for saving time and irritation. Just because you can make a hundred set-pieces for your game doesn't mean you should. Start with what ZZT can do first and build around that. When (or if) you come across a situation in your game that requires bug abuse, long tedious work, or a clumsy lo-fi adaptation of your idea, instead dig into Weave's bag of tricks. If you're not sure where to start, feel free to ask in the Discord and someone (usually me) will guide you to some Weave features or coding you can use to get unstuck.
ZZT is not a marathon. It's a race against other obligations. It's a race against the seductive promises of Godot, Unreal Engine, GMS. It's a race against disinterest. A race against a Jam deadline, perhaps. I hope seeing my workflow will inspire you to find what works for you, and hopefully you find one or more of these tools or tricks useful. Whatever you do, don't let a few silly pictures stop you from finishing your game.
Files
A note about Zima 0.9.0
If the above link doesn't work for you, you may have to build from source. Pull down the source code to zima 0.9.0 and follow the instructions. To run the .jar above, I installed OpenJDK version 17.0.2 for x64 windows, and ran the following command:
C:\jre\bin\java.exe -jar zima-0.9.0-all.jar
Adjust folder location etc. according to your needs. I hope you're able to get it working. By the bye, it's also really great when converting non-Moebius images; better than any previous version of Zima you may have tried.
Good luck. I love you all. -WiL