Where can I get KevEdit?
KevEdit is available on GitHub
KevEdit
So you've decided to create something for ZZT! That's awesome! You can access ZZT's editor by launching the program and pressing the "e" key to open the editor... but while ZZT's editor remains fully capable of creating worlds, there are alternative third party editors available which offer many more features that benefit both experienced ZZTers and newcomers alike. There are three of these alternatives to the default editor available, but we'll be focusing entirely on KevEdit by Kevin Vance and Ryan Phillips.
KevEdit is the definitive ZZT editor available and almost certainly the one you'll want to use. It supports copy/paste functions both for elements on a board as well as when writing ZZT-OOP code. It offers syntax highlighting for code, the ability to import/export code to a file, and a full color palette. Best of all it has native versions available for Windows and Linux (and MS-DOS) so you can edit comfortably from outside of an emulated DOSBox environment.
KevEdit's main alternative back in the early 2000s was CyQ's ZZTAE for MS-DOS only which is written in QBASIC, and can be rather slow to read and write worlds. Then there's also the more modern Zap by Saxxon which uses a more traditional GUI for its editing and is intended to be used with a mouse.
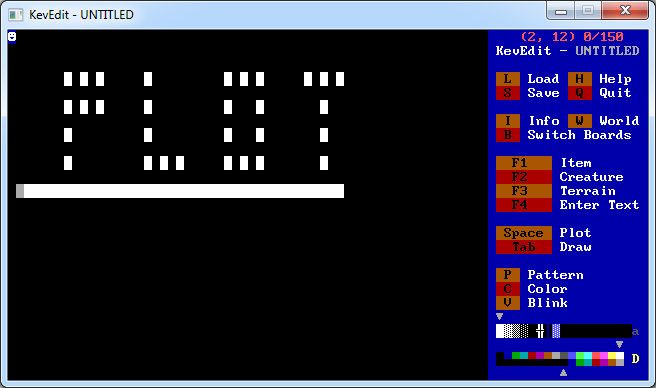
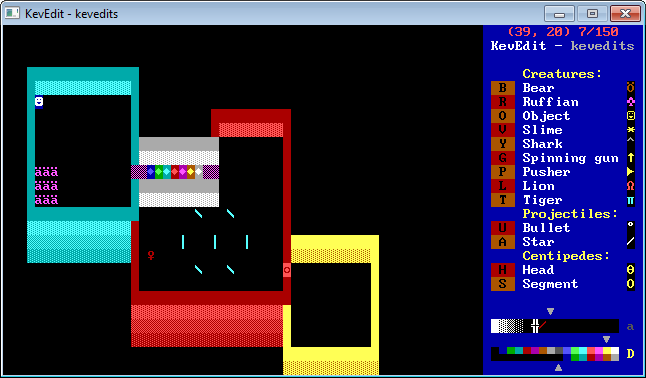
The first thing to do is of course grab a copy of KevEdit from its GitHub repository at https://github.com/cknave/kevedit. The downloads section should have you covered. Once you have it installed/extracted simply launch the executable and you'll find yourself with the blank slate of a new world.
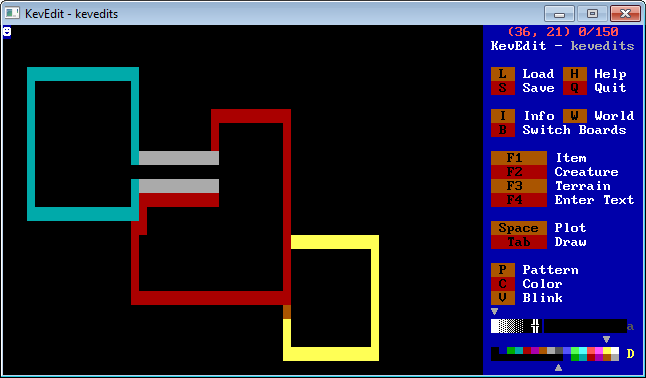
The board will be empty except for a player in the top left corner which is also where the editor cursor will be. You can move it around with the arrow keys from one tile to another or you can jump ten tiles by holding the "alt" key before hitting a direction.
KevEdit's first time saver is the fact that its default boards are empty rather than having a yellow border which is almost never wanted and sometimes left in by lazier ZZTers. They're frowned upon and are typically seen as a mark of an inexperienced ZZTer.
Most of KevEdit's controls are the same as the ZZT editor's to make it easier for somebody to pick up the new editor if they're familiar with ZZT's own. Try moving the cursor around and pressing the space bar to plot the currently selected pattern. By default this will be a white on black solid wall. KevEdit will automatically replace anything underneath the cursor when doing this. ZZT will first erase the tile to an empty and require the user to press space again to plot.
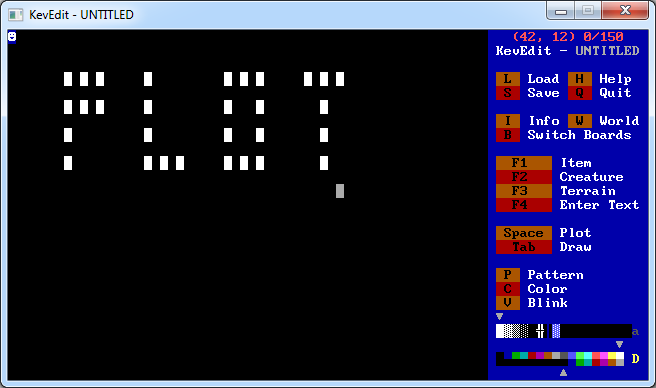
Of course, placing things tile by tile would get tedious very quickly. KevEdit also implements ZZT's draw toggle with the "tab" key which will automatically plot the selected pattern when the cursor is moved to a new tile. You can combine this with the "alt" + direction movement to quickly draw long lines. Pressing tab a second tab will shut off drawing mode.
Next we'll want to save our world by pressing "s" to open the save dialog. This will prompt the user for a filename to save which can be at most 8 characters long to work nicely with ZZT's MS-DOS filename requirements. KevEdit uses a lowercase extension while ZZT uses uppercase. ZZT has no problem with these being different, but depending on your operating system this can make a difference as to whether or not "kevedits.zzt" and "KEVEDITS.ZZT" are the same thing or two independent files. This lowercase extension also applies when saving an existing world that has the .ZZT extension in case-sensitive operating system which can be annoying when you end up making a copy instead of overwriting an existing world.
KevEdit also lets you hit control + d when the save prompt is open to save in a different directory while ZZT is forced to save in its own directory.
The first board in any ZZT world is its title screen and while its possible to have the player access it, usually the title screen is just that. Let's hit "b" to bring up the board list.
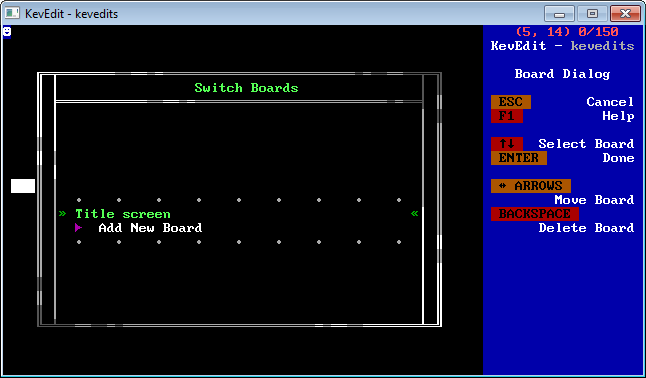
It's pretty sparse since we have nothing but our title screen. Move down to the "Add New Board" hyperlink and hit "enter" to create a second board.
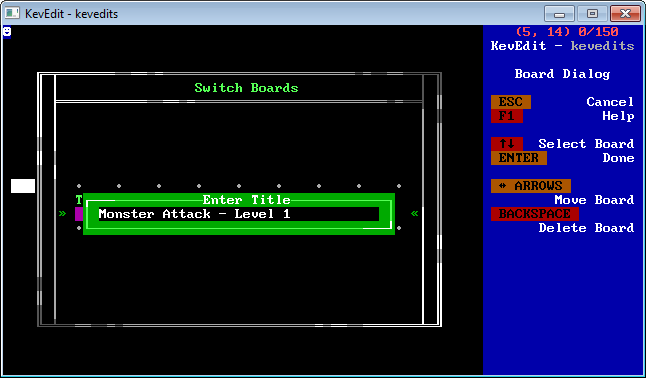
Enter some text to name the board and hit enter to confirm it.
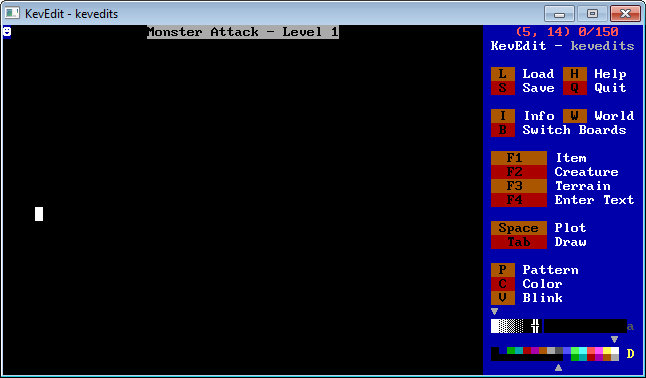
A new blank board will be created and its title will appear on top until the cursor is next moved. The cursor remembers its X/Y position.
Now let's use the pattern buffer and color selector to make some level geometry. If you make a mistake, you can erase a tile by pressing the "delete" or "backspace" key over it to turn it into an empty space again.
Pressing the "c" key will change the currently selected color along the bottom list. One of the major reasons for the creation of external editors in the first place is that ZZT only lets the player select the seven bright colors to the right and restricts the colors of many elements as well. Originally ZZTers would use "Super Tool Kit" which had edited the ZZT files by hand to produce walls or objects or whatever was needed of these special colors. Later people began consolidating the most essential special elements onto toolkits which they could then import into their own ZZT worlds to keep board clutter down.
KevEdit makes these unnecessary by simply letting the creator choose colors as they please.
Pressing the "p" key advances the selected pattern. Pressing a capital "P" moves it backwards. The pattern bar is split into a left half and a right half. The left is almost the same as ZZT's own pattern bar. KevEdit's goes: solid wall, normal wall, breakable wall, water, empty, and finally line wall. The solid, normal, breakable, water pattern comes up very frequently in ZZT as it makes a natural gradient. Water has its own properties like bullets traveling over it, but is more often used for graphics than as actual water.
In addition to changing the foreground color, pressing a capital "C" advances the background color. Here KevEdit lets you select black or the seven dark variants of ZZT's default colors. It is unfortunately impossible to have a bright background in ZZT since the video mode instead uses blinking colors rather than high intensity backgrounds. External programs like "BlinkX" can get around this.(Running ZZT in windowed mode on older versions of Windows which could still run MS-DOS programs natively works as well but usually isn't relevant these days.)
Picking colors with the "c" key isn't so bad when you want the next one over, but it can be pretty annoying to move from one specific color to another.

A far faster way of selecting colors is with the "k" key. This brings up a full preview of every possible color combination which can be selected with the arrow keys and enter to choose. Remember that ZZT will not display bright backgrounds the way KevEdit does! The entire right half of this menu is off limits unless you actually want the colors to blink. For example, a bright blue on bright green breakable will in ZZT will alternate between display a bright blue breakable character on a dark green background, and just displaying the dark green background and no foreground character at all. They can be useful for magic portals, alien technology, and maybe even a very crude form of palette cycling, but don't get much use otherwise. (You can also toggle blinking with the "v" key on the main editor menu.)
Here I've added some shading below the walls to give a simple sense of height to the smaller rooms. I kept the walls on the inside only using normal walls since breakable walls can be shot and water can be shot over (plus I don't have a ton of room).
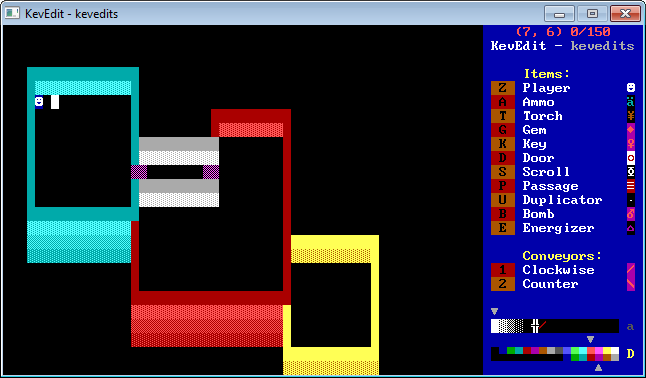
Let's start checking out the element menus accessed with the function keys and start placing some things down. Press F1 to open the "Items" menu.

This list is identical to the one in ZZT's own editor. From the late 90s onwards ZZT games rarely use anything from here other than the player and passages, but there's absolutely a time and a place for all of them. The main reason for their disuse is mostly just that "You're an undercover cop disguised as a priest" doesn't mesh well with "conveyor belts are pushing you around". Before doing anything else, we should put the player inside one of our rooms with "Z" from this menu.

Every element placed via the element menus except for the player will result in that element being placed where the cursor is and nothing more. The player is slightly different. It still gets placed under the cursor, but the player already on the board gets moved to the new location. This is because ZZT doesn't actually want there to be more than one player on a board. It's possible both with KevEdit and ZZT's editor to place extra players regardless, and they're essential for many more complex tricks and engines, but for this simple tutorial game we won't bother with them.
If you change your selected colors look at the items list again, you'll note that some of the items have changed color. Here the selected colors are bright red on dark purple and the gem, key, bomb, and conveyors all match these colors. The door and passage elements also partially take on the selected colors and are both white on dark RED rather than purple. By default only certain elements in ZZT have selectable colors, and some have their own coloring rules. Since ZZT has no concept of a background, the door and passage elements here are what ZZT considers red doors and red passages: white on the dark version of the selected color. If an object "#put e red door" the white on dark red door here would appear to the east of it.
Let's actually place one of these red doors as the entrance to the last room so I can segue into some more features of KevEdit.

Ok, so we have a door, but there's an issue of accessibility here. ZZT runs at 640x350, which if you're not running in fullscreen mode is pretty tiny on a modern display. It can be very difficult to tell what color a door is without running into it. An easy fix is to use some normally restricted colors for the door. For example, if we made the door bright red on dark red it would be a lot easier to tell at a glance what key was needed.
To do this, we'll first pick the color with "k", and then press "d" before opening the item menu again.
The "d" key toggles "default" colors. This is used for two purposes, the first of which is setting colors in the element menus to exactly match the selected color as opposed to ZZT's interpretation of the color, and the second we'll get to later on. Now you can see nearly everything on the menu is red on dark red, but there are still exceptions! Here the player and scroll still retain their standard colors.
The reason for this is because these two elements have color animation. Scrolls cycle through ZZT's seven colors over every frame, and the player flashes character and color when invincible from an energizer item. It's technically possible to make differently colored players and scrolls, but as soon as ZZT updates its screen their drawing code will turn them back to normal so KevEdit doesn't bother giving you the option so as not to mislead you.

Pressing "d" in the item menu again places a new door, this time much more obviously red. (Colorblind players may still have issue though!) Next place some items around! Be sure to include a key that ZZT will understand as red to open the red door! This can be any key with a bright or dark red foreground color. You'll probably want to press "d" again on the main editor menu to toggle the default colors on and off again as you place your items.
If you're reading this and are completely new to ZZT, you should definitely take a look at DEMO.ZZT which should have been included with your copy of ZZT. It's a basic introduction to the elements in these menus.

So now there's some ammo, gems, conveyors, and a key for our door. Let's open the creature menu next and see what KevEdit offers.
The creatures menu is almost the same as ZZT's. ZZT moves lions and tigers under their own heading called "Beasts" but there's no real reason they'd be in a category of their own. KevEdit allows you to place bullets and stars directly. Let's actually mess around with bullets in our yellow room.

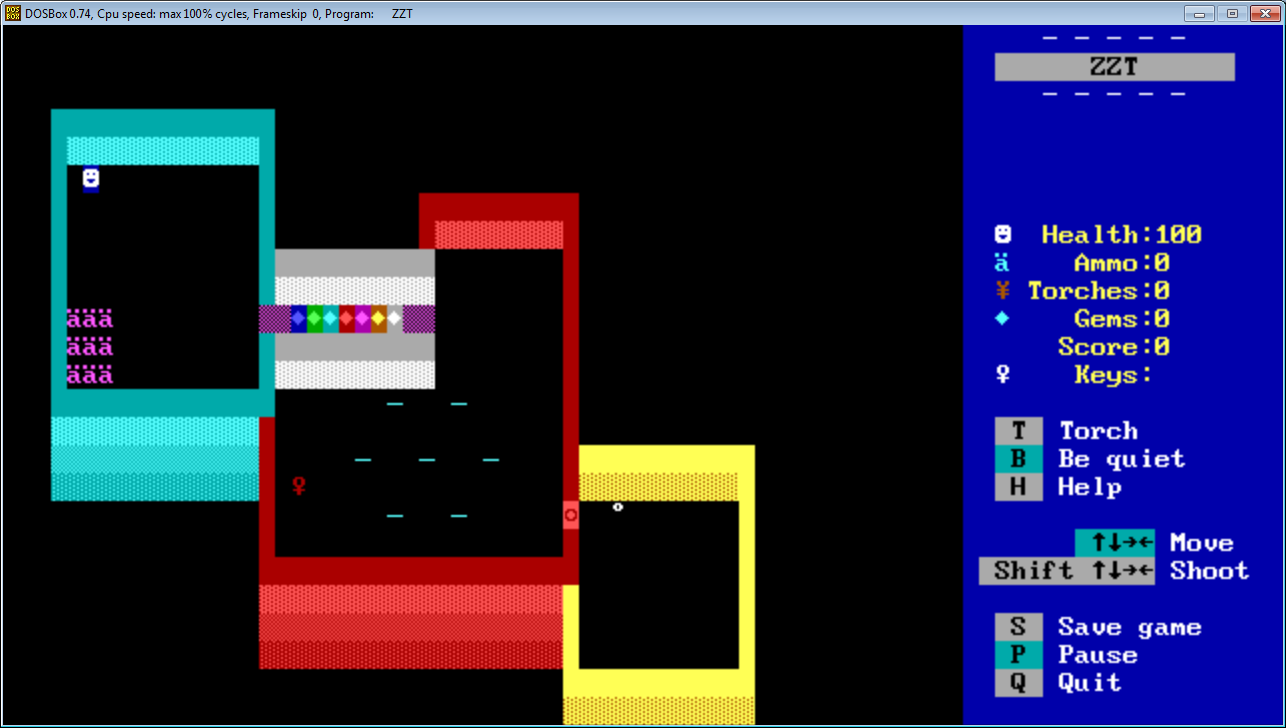
Our first bullet is placed. But what does a bullet do? Especially just a plain old bullet placed in a way ZZT normally wouldn't allow? You should test it in ZZT! Save your world. If you are (un)fortunate enough to be on an operating system that can still run ZZT natively, hitting "alt" + "t" will launch ZZT.EXE in the current directory and load your world automatically. That's almost certainly not the case however so you'll have to launch it yourself via DosBox. (The Linux version of KevEdit does have support to launch DosBox with this key combo instead.)
Load the world and there's our title. Press "p" to play!
The game starts paused, watch the bullet and then take a step to unpause it. It'll travel north and hit a wall. But we might not want a bullet that goes north. Let's go back to KevEdit and change the bullet's direction. Highlight the bullet with the cursor and hit enter on it.
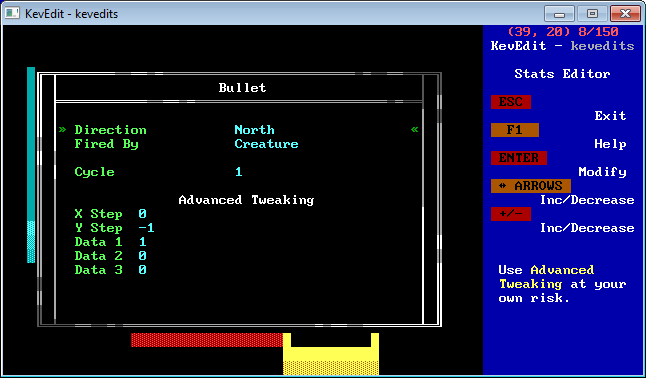
The stats editor for the bullet will open up. You can set properties here including the bullet's current direction, what ZZT thinks fired the bullet, and the cycle of the bullet. Pressing enter will cycle through the choices in case you want to make the bullet move south instead, or be fired by a player rather than a creature. You probably won't really be placing bullets around much but it's a good example of something you can do in KevEdit that ZZT just won't. If you opened this world in ZZT's editor and hit enter on the bullet there would be no menu at all.
(Whether a bullet is fired by the player or something else determines if other creatures can be hit by it, and if it counts towards the maximum shot limit set on the board.)
Changing the cycle also can allow for some otherwise unseen behavior. Normally bullets move at cycle 1, which means every single cycle. If you set it to two, they'll move every other cycle and slow down. Nothing in ZZT can create a slow bullet, but perhaps you have your own ideas for what you can do with them.
There's also the advanced tweaking which lets you manually set properties. If you change the direction or fired by properties, you'll see the X/Y-step values and Data 1 change. ZZT will check a bullet's X/Y-step when its its turn to update and move to a new tile. If you set it manually you can create things like diagonal moving bullets, or even stranger, bullets that skip over tiles entirely by having values that aren't 0, 1, or -1.
Do you all want to go on a brief aside and figure out that there are in fact multiple ways to make a landmine with bullets like this? And that one way is actually superior to the other? Heck yes you do.
First, the wrong way that doesn't actually work. If you cycle through the possible directions KevEdit suggests, one of them is "Idle" which sets the X/Y-step to 0. This means that the bullet will try to move 0 spaces on the X-axis and 0 spaces on the Y-axis. Sounds good, but ZZT will actually try to move it to the same tile it occupies already. When this happens, ZZT will see that the tile is already occupied and tell the bullet to handle a collision with the element at its destination tile, which is its current tile. So the bullet hits itself, and when a bullet hits a bullet, the bullets are destroyed. As soon as the bullet gets a cycle to act, an idle bullet will vanish.
So one way which will actually work is setting its cycle to 0. If an element has a cycle of 0, ZZT will never give it a chance to act. At this point it doesn't matter what direction the bullet is specified to move in because it's never going to get a chance to move. When a player walks onto the bullet the player code will see that it touched a bullet and handle the damage just fine.
The other way, and the ideal way, is to actually remove the stat entirely! KevEdit allows you to do this by opening the Tile Info window by pressing "control" + "t".
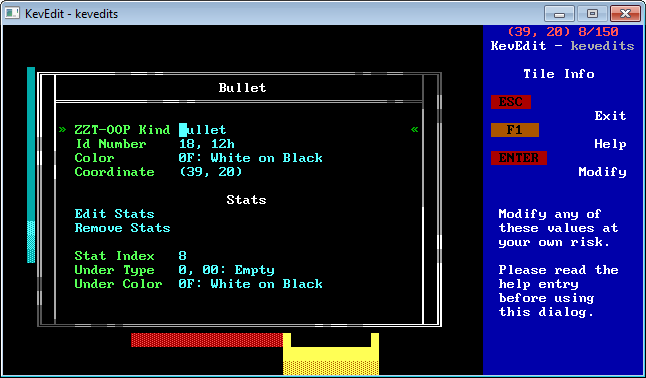
This is an aspect of KevEdit that is rarely needed, but a good example of how powerful it can be. This is about as bare metal as it gets, from this menu you can change the element from a bullet to any other tile, its color, and edit or remove its stats. It also displays information on where in the stat order the element is. This order is what ZZT follows when determining which stat element acts next.
You can also change the tile underneath the current element and its color. ZZT normally will only ever have empties, fake walls, or water underneath things, but you can make it so when this bullet moves there's a gem underneath or something. It's not all that useful since whatever is underneath won't have a stat. If you go to edit the existing stat you'll wind up in the same interface you'd get if you just hit enter on the bullet.
You can also use this menu to add stats to things that don't normally have them. This is completely useless unless you're trying to fill out the stat limit on a board for some reason.
Anyway, if you select "Remove Stat" from the bullet it will no longer have stats and ZZT won't process it. Hitting enter on the bullet won't bring up a stat editor because there's nothing to edit.

Hitting "enter" on any tile does have some effect however. If you look in the pattern buffer past the blue pipe character the bullet will be there! The pattern buffer offers ten spaces that can be customized with elements you're working with. ZZT's own editor offers a single one of these. As you hit enter over tiles, the element gets added to the left of the list and the others are pushed right and eventually removed. If you press "a" you can toggle automatically adding things to the buffer which will make it so just moving the cursor to a tile adds it, no "enter" required.
You can also jump around the pattern buffer with the number keys. 1-9 will jump to the first 9 custom tiles in the buffer. Pressing 0 rather than go to the 10th instead jumps to the empty in the left half.
Of course, the constant pushing of elements in the buffer means that pressing 3 might get you to a green solid at one time, but then a lion the next. I personally can't stand it and have never ever used it in its default setup.
I instinctively at this point when opening KevEdit immediately hit "/" and then "<". The slash locks the buffer so nothing will ever be added to it unless I choose to do so by highlighting a slot on the buffer and pressing "insert" to add it there myself. The "<" adjusts the size of the buffer, shrinking it to just nine tiles. You can also grow it with ">" and scroll through any unseen tiles with the "p" key. A locked custom buffer that's nine tiles in length matches the interface used by CyQ's old ZZTAE editor which I preferred at the time, but runs awfully under DosBox and is far from ideal to make ZZT worlds in today.
Both options are there though! Find what works best for you! I find the convenience of consistent shortcuts to be better than a large history, but I imagine most ZZTers used KevEdit's default system.
Oh! And one other important thing to mention about the pattern buffer, is that the "d" key toggle for "default" colors also applies to the custom portion of the buffer. If you have a purple lion selected in the custom buffer, set the colors to blue on dark cyan, the default colors mode is off, and you try to place that purple lion it will take on the blue on dark cyan colors instead. This can be an easy way to make items or enemies in multiple colors without constantly editing their stats to match.

So here I've made a little minefield out of statless bullets. Going with no stats over cycle 0 helps keep the board's stats and size down. You can see up in the top right corner the 7/150, that is the count of (non-player) stat elements on the board. A board can actually have 151 stats, but one is always going to be used up on the player so KevEdit chooses not to bother counting it.
I also have yet to mention the coordinates alongside the stat count as well, but you've likely figured that one out by now. ZZT's coordinates go from (1,1) in the top left corner, to (60,25) in the bottom right.
In addition to saving stats, not having them on our landmines also saves space for the board and world themselves. Pressing "i" will open up the Board Info window.

At the bottom here is the current size of the board. Here it's only 930 bytes. ZZT only uses a limited amount of memory for its entire program, and while there's no hard number for how much space a board can safely take up, a good rule of thumb is to never go over 20 KB. Some err on the side of caution and try to keep things under 18 KB. If you're making a traditional ZZT game in the style of Town, it's a limit you'll almost never need to worry about. However if you're creating a complex engine with lots of objects with vast amounts of code, you'll run into it soon enough. If you go over the limit you'll run the risk of runtime errors in ZZT. ZZT's own editor will often corrupt the board as well. Smaller boards are safer boards.
There's also the usual ZZT board information displayed as well. The board's name, whether it's dark, whether or not the player is transported back to where they entered the board from when hit by an enemy, a time limit, how many shots the player can fire at once, and the boards that connect to the current one.
KevEdit also offers the ability to manually set the Re-Enter X/Y coordinates the player is warped to when hit if Re-Enter when Zapped is enabled. Keep in mind that entering a board from a passage or adjacent board will update these values to wherever the player first appears. You can even do checkpoints by having passages that lead to the same board and cause the player to not go anywhere, but update the Re-Enter position.
Lastly, the board connections let you hit * to automatically make the second board connect to the current first board. In ZZT boards can connect arbitrarily and don't need to make a cohesive map. They can even connect to themselves! A common bug is to forget to link your boards both ways hence the usefulness of connecting both boards at once without having to open the second board and manually link it to the first.
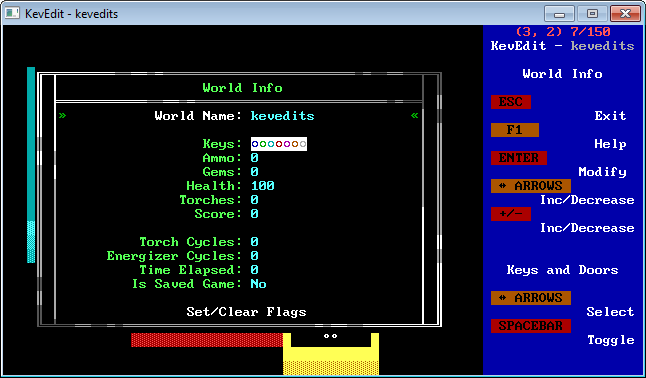
And then to go with the board information, is the world information. Here you can set the initial values of all the counters in the sidebar when your world is played. At first glance it may seem odd that ZZT supports setting starting health and ammo while ZZT's editor not allowing for it, but the reason behind this is because ZZT worlds and ZZT saves are identical except for a single byte to indicate the save as a save. Which, you know, is why there's an "Is Saved Game" value at the bottom of the list.
If you set the world to be a saved game, ZZT will still load it from the world menu just fine (it uses the file extension to determine world/save). However, if you try to open a file ZZT considers a save in its own editor you'll be booted out for trying to cheat. Some folks would purposely set this byte to "Save Lock" the world. KevEdit doesn't care though.
The torch and energizer cycles can actually be worth manipulating here since they can't be adjusted in ZZT, only set by lighting a torch or picking up an energizer. These items set the cycles to a fixed number which decreases, leaving the torch extinguished or player vulnerable when the cycle count runs out. You can set them to very large numbers here (up to 32767) which will result in an extremely long lasting torch or invulnerability period. (For reference, a cycle is roughly a tenth of a second, so 54.6 minutes of torch light can be gotten by editing this value.)
Then at the top of the world menu is the "World Name", this should almost always always always match the filename. ZZT uses this when you quit a game and hit "p" again to know which world to load. If you set this value to say, "TOWN", then the player could go from this world onto TOWN.ZZT after quitting to the title. It's not really practical and no data is transferred from the old world to the new one so you can't link files together or anything.
Lastly of interest here is the "Set/Clear Flags" option at the bottom. Selecting it brings up a list of ten flags which may be set here. Again, this is usually used by ZZT's saves, but you can manually set some in advance here. You can also try setting a flag to "SECRET" (it might have to be the first one), which will lock the world from ZZT's editor. The "SECRET" flag is what was used by Tim Sweeney to prevent players from editing Town, and the other official ZZT worlds, though there are tools and even ways within ZZT itself to break the lock.

Ok! So I've placed a few lions of various colors down. Let's take a look at the last two menus on the sidebar not explored, terrain and text.